Showing posts with label gardening. Show all posts

October 28, 2008

Save Those Nutrients!


This week while you’re walking around the city enjoying the crisp fall air and delighting at the leaves tumbling down the street, take a moment to think ahead to next year. Instead of letting the street sweeper brush them all away, capture the nutrients of those fall colors for your garden next spring. A leaf compost pile is one of the simplest composts you can do. All it takes it the right container, those pretty crinkled leaves, a little activator, and time.

You can buy a compost bin at just about any mega-improvement store these days, but they are a little pricey for what is fundamentally a dirt holder. Instead, try making your own from salvaged or simple materials. I made this one from 10’ of chicken wire, 6 twist ties, and four metal stakes. It took me about twenty minutes to build – the biggest chunk of time going to hammering in the stakes. You can also try using an old garbage can, palettes, etc. My mom made a beautiful compost bin a couple years ago out of sticks woven into a huge basket. It also doubles as an art piece.

Here are the steps to start your spring garden compost:
1. Build an aerated “container”
2. Put down a layer that will allow air to circulate around your compost. I used sticks. You could also use a couple boards, spaced out bricks, etc.
3. Add leaves
4. Water them down
5. Add a heating agent like manure or bone meal
6. Repeat

Leaf composting is a great way to live locally and keep a little extra out of the landfill. Without food waste your compost should stay rat free. Have fun and happy Fall!

October 20, 2008

Guerrilla Gardening


I know you want to do it.  Gardening that is.  But you live in the city with a small patch of grass or weeds or maybe marigolds in the back yard and you have nowhere to plant your tomatoes and hops and rosemary!  OMG what to do.  

Guerrilla gardening may be your answer.  By far the most fantastic idea I've seen in a while.  I have been yearning for years to begin a community garden, to join with fellow fresh vegetable lovers to plant pretty things and pick them to eat orgasmically in just a few weeks.  But this idea is better...plant something in patches of mud or grass left untended or left to be ugscape (ugly scape: ie: nothing nice to look at); and plant something pretty!; whether it be a flower or a vegetable or an herb!  And then many more people than you can enjoy that little plot that was previously mud or pebbles.  Check out the guerrilla gardening website, then get excited, and THEN start your own group.  Beautify your neighborhood & mine, pretty please?

October 19, 2008

Canning Tomatoes: a beginners how to

I have finally gotten  over the scary hump of canning tomatoes, and just did it.  Very rewarding I must say!  I wanted to do this so I could still be eating local produce (as much as possible) through the winter.  Canning is an excellent way to support your local farmers and have their nutricious foods preserved for your winter 
fare.  *I do not have a camera right now, so the following pictures were taken with my computer, and aren't the most amazing.  My apologies!  Many folks who can regularly have canning equipment: I do not.  So don't be afraid to try to use what you already have!  First, go to your farmers market, garden or store and get your tomatoes!  Today I used 10 lbs of beefsteak tomatoes from a farm in Michigan.  They were only 2 dollars a pound too, which is fantastic.

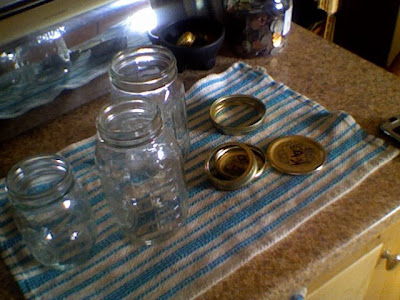
Step 1: Santize your jars.  I used a mixture of what I had lying around: wide and narrow mouthed mason jars.  My jars have a lid and a ring that you use to seal the jar.  Santize by either placing in dishwasher or a large pot of boiling water for 5 minutes.

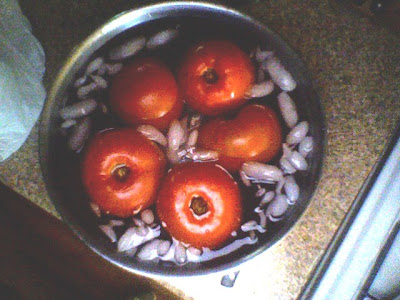
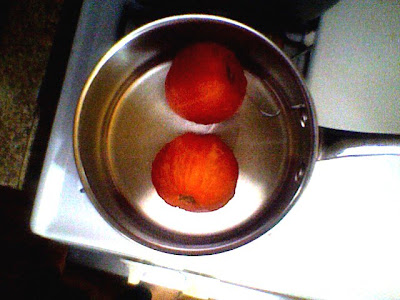
Step 2: Boil a large pot of water for de-skinning the tomatoes.  When the water is boiling submerge the tomatoes until you see their skin crack.  (My beefsteaks boiled for about 5 minutes before their skins broke).  
When the tomatoes skin is broken, place them in an ice bath, so they can cool down for you to peel them.  When they are cool enough you should be able to pull the skins right off.
The peeled tomatoes can either be cut into chunks or pured.  I prefer to do halved tomatoes in my larger jars; find they are more versatile this way. 
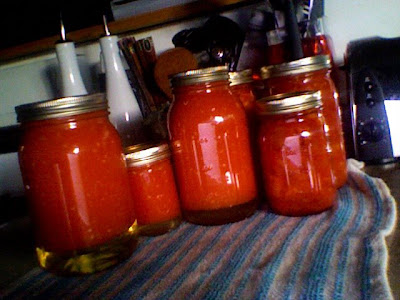
Now fill your jars within 1/4" of the top, make sure the top is clean (you can wipe with a paper towel or clean rag) put a tablespoon of salt in a large jars and a teaspoon in the small ones.  Place the lids on the jars and you are going to boil the jars standing up in a very large pot of water.  The tops of the jars need to be submerged.  Some people do this from 5 - 40 minutes.  I do it until the top is popped in (so when you press down it does not click any more, you might even hear a POP! while its in the water bath.)  If the top hasn't popped by 40 minutes, you take take it out and it should pop in a few hours.  This made 3 large & 1 small jar of diced tomatoes AND 1 large and 1 small jar of tomato puree.  

September 23, 2008

Local Food Knowledge

I have been hearing about this book for sometime, but finally picked it up after I wanted to start a fall garden and everyone's advice I sought went in a different direction.  So I called a friend, who just moved to Cali and has the greenest thumb I know and she said 'Oh I don't know, let me find this book, I always use it as a garden reference'.  This book was Animal, Vegetable, Miracle By Barbara Kingsolver. I bought it, read it, and won't think of my garden in the same way again.  Also,  I have been vegan for sometime: mostly because I never had the time to look into local foods.  Even though I won't eat meat again, this book gave me a new perspective on local foods, food origins, and has made me rethink my approach to my diet: and how my diet affects our world.

I have much more to say, but I'll let the book speak for itself. (Its much more interesting!)